It’s no secret: good listing photos sell homes faster and for more money. That, combined with the fact that most house hunters search online, makes a very compelling argument for investing in professional photography. If you’re determined to tackle the task yourself, here are some tips from the pros on how to take better interior real estate photography. (Looking for advice on exterior photography? Check out our article, Capturing curb appeal: 4 real estate photography tips).
1. Get the right tools. Great photography starts with good equipment. Use the best camera option available to you, preferably with a tripod to help you keep the camera level and steady. If you have multiple cameras and aren’t sure which will work best, take a test shot with each and compare them side by side on your computer. More megapixels don’t always equal a better result. However, you’ll want the option of using photos at a fairly large resolution (Zillow accepts up to 2048 x 1536 pixels), so make sure your camera can take photos at least that size.
Take some time to familiarize yourself with the camera’s capabilities. Be sure you know how to turn the flash on and off, set the focus, turn off the date/time stamp, and zoom in and out. Some cameras have extra features like low-light compensation, an HDR application, or wide-angle or macro lens capabilities that could help you get a better shot. Experiment!
Once you’ve taken your photos, you may also want a graphics editing program to help you crop or resize them. See the National Association of REALTORS® pick for free photo editing.
2. Plan your shots. When it comes to listing photos, more is better—but only if those photos are good. Plan to take photos of each of the main rooms of the home, at least one exterior photo and additional shots of your home’s marketable details, like wainscoting or crown molding, a swimming pool, a stone paver driveway, etc. Bring your camera and take some test shots as you scout from room to room; the practice will make things easier when you’re ready for the real shoot.
- Look for angles that let you show as much of each room as possible. Be ready to move furniture out of your way to get the shot you want.
- Avoid shooting into blank walls.
- Don’t center your photos on prominent room features (i.e. the refrigerator in the kitchen, the TV in the living room, the toilet in the bathroom) or on a room’s corner. Try a few different angles to see what works best.
- Consider taking shots from up on a chair or step ladder, or crouching low to the floor.
- Look for potential obstacles, like surfaces that may show your reflection, narrow rooms that don’t have workable angles, areas with poor lighting, etc.
Remember, you don’t have to show every part of your home in the listing photos. If there’s nothing special about your powder bath or your upstairs hallway, feel free to leave them out and let stronger photos speak for your home.
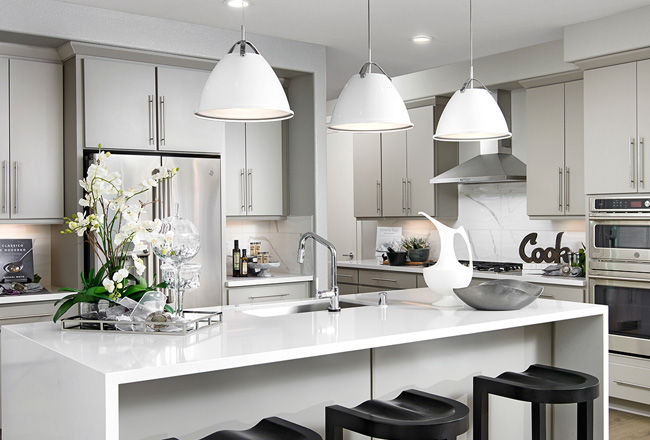
Example 1: This kitchen photo has been well staged and well lit, but it only shows a small portion of the room.
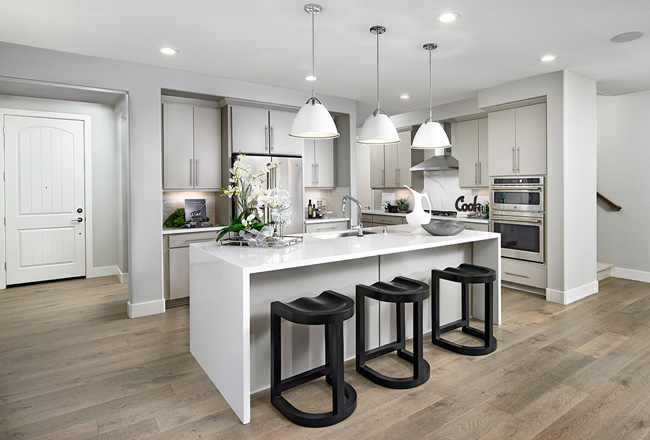
Example 2: Simply by stepping back and finding an angle that shows more of the room, we achieved a better, more useful result. A potential buyer can now see that the upper cabinets have crown molding, there’s a built-in microwave over the cooktop, and the room has recessed lighting.
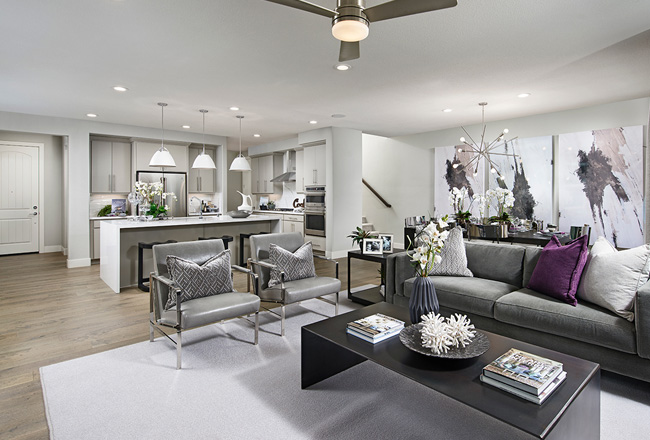
Example 3: By stepping back even farther, we can showcase the kitchen’s spacious open layout, the convenient dining area and the elegant hardwood floors—in addition to everything we saw in Example 2.
3. Stage your space. If your house is ready to go on the market, you’ve got a head start on this step. If not, you’ll want to declutter and clean the room you’re about to shoot.
- Put away seasonal decorations so your photos won’t be dated.
- Thin out your family photography, knickknacks and personal memorabilia, so buyers have an easier time imagining themselves in your space.
- Take stock of your room’s furnishings. Are the pieces the appropriate size for the space? Large items (or too many items) can make a room look too small and busy. Don’t be afraid to move things out of the room while you’re taking your photos. By the same token, don’t hesitate to borrow items from other rooms to help you show the space to its best advantage. For example, a well placed mirror from the bedroom may help break up a long, blank wall in the great room. Though you’re selling the home, not your décor, an attractively furnished room can help buyers feel more at home than an empty room.
- Consider adding a houseplant, fresh fruit bowl or small floral arrangement to give the room a fresh, inviting look.
- Encourage family members and pets to bow out of your photos. Some buyers may not mind seeing them, but why risk alienating those who do?
- Don’t forget the details! Close the toilet lid, shut cabinet doors and drawers, turn off the TV, straighten and fluff throw pillows, etc.
Check out the “Sight” section of our article, Home staging tips: How the 5 senses help you sell, for more tips on staging your space for listing photos.
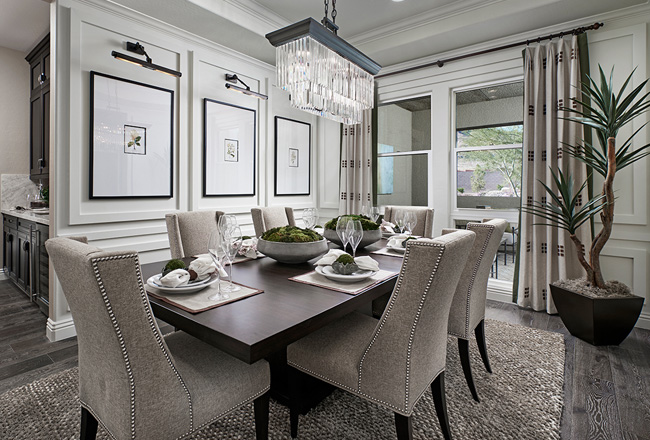
Example 4: Something as simple as setting the table in the dining room can make a photo more inviting.
4. Make the most of your light. If you don’t have a professional photographer’s lighting equipment, you’ll need to use the lights you do have to their best advantage. This may require some experimentation, depending on your window placement and orientation, available lamps, window coverings, wall colors and other factors.
- Try taking indoor photography in the early morning, at twilight or on a cloudy day. Sunlight streaming through your window may be beautiful in person, but your photos may suffer from the overexposure.
- Turn on all the lamps and lights in the room and adjoining rooms. The goal is to make the lighting in the room as even as possible, with no extra bright spots or deep shadows. Nothing should be backlit.
- Avoid using your flash, if possible. If you must use a flash, aim it at the ceiling to diffuse the light.

Example 5: Even with great interior lighting, this photo looks washed out, thanks to the strong sunlight coming in through the windows.
Example 6: Waiting for a different time of day can make it easier to get the shot you’re looking for.
We can’t promise that these tips will deliver professional-grade results, but they should help you avoid the common photo mistakes that would land you on BadMLSPhotos.com.
Looking for more home selling ideas? Check out the For Sellers section of our blog!